Create an incoming webhook
Create an Incoming Webhook by registering within a channel to receive an endpoint for messaging. In this unit, you’ll learn how to register an Incoming Webhook in a Microsoft Teams channel.
Overview
When you register an Incoming Webhook, Microsoft Teams provides a unique endpoint that your web service will use to send a JSON payload with the message for the channel. These messages can be text-based messages or rich messages that consist of images or cards.
Key features
Let's look at some of the key features of Incoming Webhooks:
- Scoped Configuration: Incoming webhooks are scoped and configured at the channel level, unlike outgoing webhooks that are scoped and configured at the team level.
- Secure resource definitions: Messages are formatted as JSON payloads. This declarative messaging structure prevents the injection of malicious code as there's no code execution on the client.
- Actionable messaging support: If you choose to send messages via cards, you must use the actionable message card format. Actionable message cards are supported in all Microsoft 365 groups including Microsoft Teams.
- Independent HTTPS messaging support: Cards are a great way to present information in a clear and consistent way. Any tool or framework that can send HTTPS POST requests can send messages to Microsoft Teams via an Incoming Webhook.
- Markdown support: All text fields in actionable messaging cards support basic Markdown. Don't use HTML markup in your cards. HTML is ignored and treated as plain text.
Create Incoming Webhooks
The first step is to create a web service or application that can send HTTP POST requests that include a JSON payload to an HTTPS endpoint.
Your service will submit its HTTP POST request to a unique endpoint provided by Microsoft Teams. The endpoint is generated when you register the Incoming Webhook within a channel.
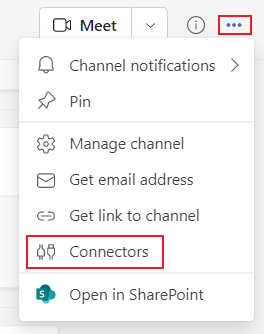
To register an Incoming Webhook, open the channel in which you want to add the webhook and select the channel menu. Select the More Options menu and then select Connectors.
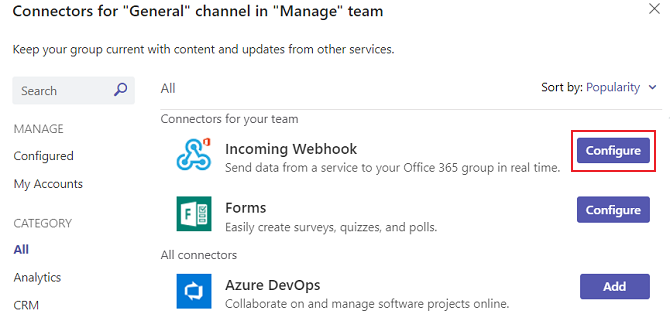
Search for Incoming Webhook and select Configure.
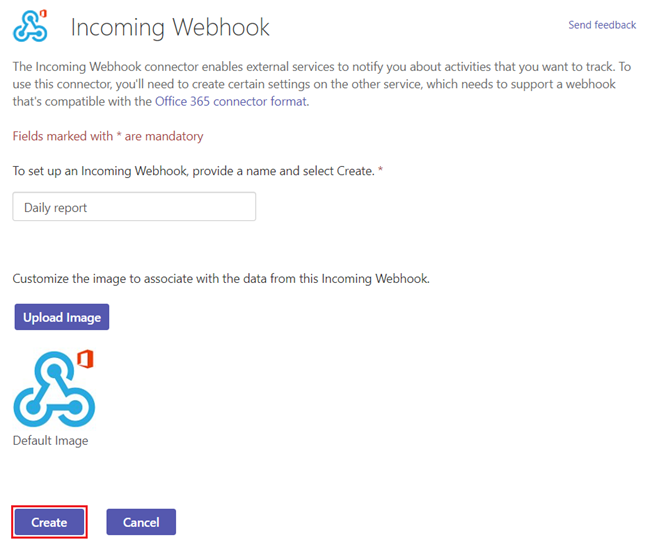
Provide a name and upload an image for your webhook, if necessary. Select Create.
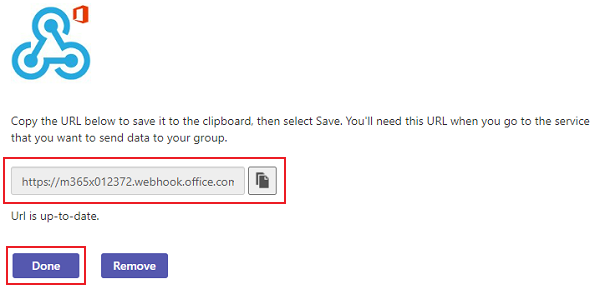
Copy and save the unique webhook URL present in the dialog. The URL maps to the channel and you can use it to send information to Teams. Select Done.
The webhook is now available in the Teams channel.
When the service sends a message to the registered endpoint, Microsoft Teams will add the message to the Conversations tab in the configured channel.